This is part of How i made this gatsby site series.
So far i have been repetitively doing designing, building and testing, right now i am at a stage to promote the changes to UAT and see the final build before implementation to perform this activity i will have to use gatsby build and finally get the site setup in Firebase to host.
# Final Stage of Testing
Source : Gatsby : Overview of the Gatsby Build Process
Gatsby builds everything ahead of time meaning it will complie all the assets like minifying css, javascript, transforming images, json files, etc. and saves them to public folder so when the site is run it doesn’t need any server-side rendering. This is one of the features that makes Gatsby fast.
Run gatsby build to initiate the build process.
Output of the gatsby build
PS D:\BigData\08. HTML\Gatsby\lupin\bdv2> gatsby build
success open and validate gatsby-configs - 1.295s
success load plugins - 51.209s
success onPreInit - 0.160s
success delete html and css files from previous builds - 0.043s
success initialize cache - 0.055s
success copy gatsby files - 1.977s
success onPreBootstrap - 0.042s
success createSchemaCustomization - 0.084s
success source and transform nodes - 22.613s
success building schema - 1.737s
success createPages - 0.473s
success createPagesStatefully - 0.409s
success onPreExtractQueries - 0.024s
success update schema - 0.144s
success extract queries from components - 2.463s
success write out requires - 0.154s
success write out redirect data - 0.031s
success Build manifest and related icons - 0.131s
success onPostBootstrap - 0.348s
⠀
info bootstrap finished - 146.724 s
⠀
success Building production JavaScript and CSS bundles - 163.394s
success Rewriting compilation hashes - 0.076s
success run queries - 212.615s - 48/50 0.24/s
success Building static HTML for pages - 48.080s - 46/46 0.96/s
success Generating image thumbnails - 521.324s - 444/444 0.85/s
Generated public/sw.js, which will precache 9 files, totaling 413577 bytes.
success onPostBuild - 20.093s
info Done building in 663.339 sec
Test the output of the build compilation using gatsby serve
Output of gatsby serve
PS D:\BigData\08. HTML\Gatsby\lupin\bdv2> gatsby serve
info gatsby serve running at: http://localhost:9000/
If everything looks good, you can signoff the UAT testing and proceed to deployment.
# Hosting in Firebase
Source : Deploying to Firebase Hosting
Steps below are pretty straight forward as in the above link,
-
Open firebase console using Google Account
-
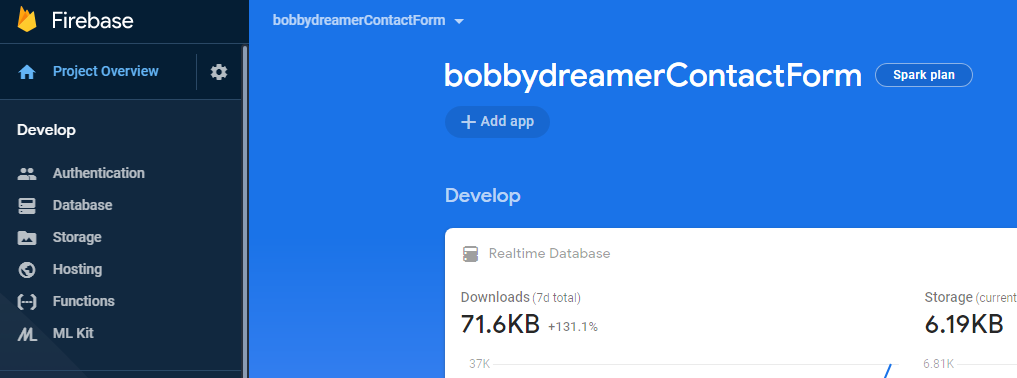
Create a firebase project ( I already have a firebase project, mostly empty, so i am using that ). Click Project Overview and click Add App
Also, i am thinking of change the project name from bobbydreamerContactForm to bobbydreamer-site as project-name seems to be editable in Settings.
-
Click
</>icon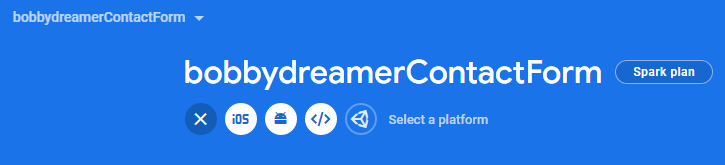
-
Fill in the details, App Nickname, Check Hosting and you have option either create new app or select existing one. I am selecting existing app and clicked Register App
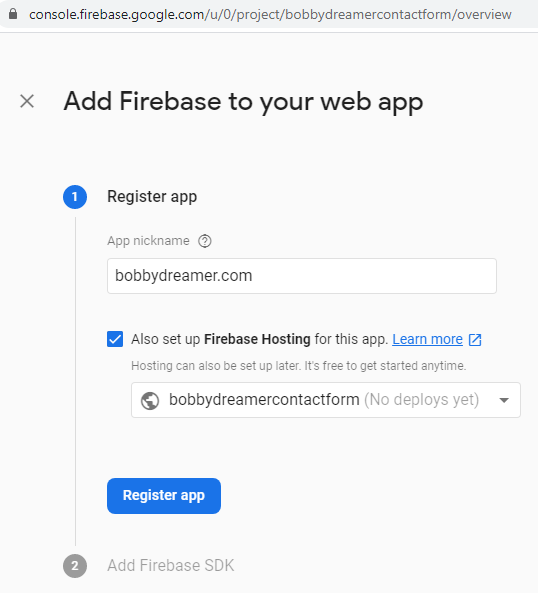
-
If you are building a Web Application, you should add this in the site. I am not using this at the moment. So, its not required for me.
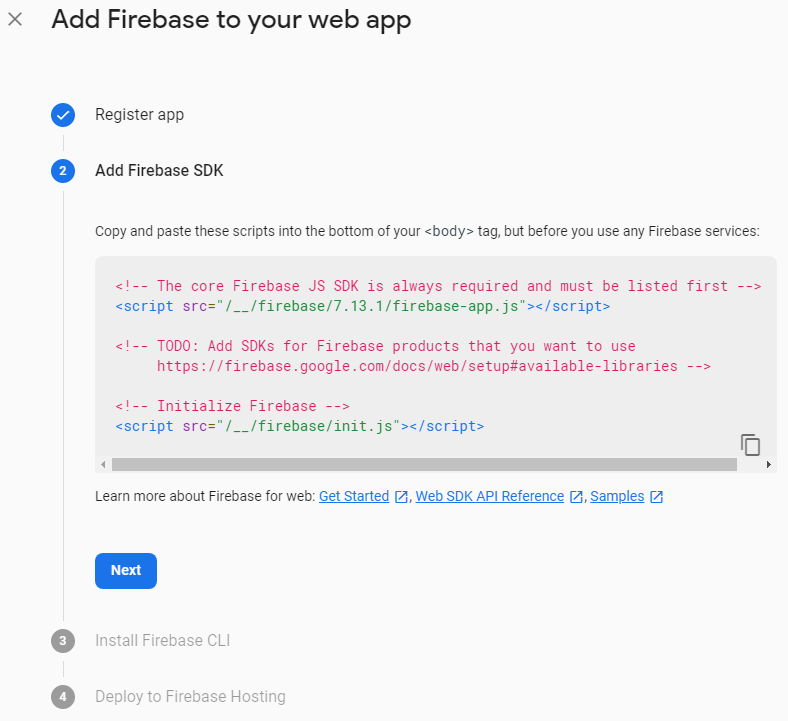
-
Install firebase-tools, its needed to host your site with Firebase Hosting.
npm install -g firebase-tools- After installation, go to the root folder of your site and sign into Firebase using Google account
firebase login- Test the CLI using command
firebase projects:list
PS D:\BigData\08. HTML\Gatsby\lupin\bdv2> firebase projects:list
√ Preparing the list of your Firebase projects
┌─────────────────────────┬──────────────────────────┬──────────────────────┐
│ Project Display Name    │ Project ID               │ Resource Location ID │
├─────────────────────────┼──────────────────────────┼──────────────────────┤
│ BTD-IN2-20180718        │ btd-in2-20180718         │ us-central           │
├─────────────────────────┼──────────────────────────┼──────────────────────┤
│ feedbacks               │ feedbacks-9be7f          │ us-central           │
├─────────────────────────┼──────────────────────────┼──────────────────────┤
│ stashit                 │ stashit-7885bob          │ us-central           │
├─────────────────────────┼──────────────────────────┼──────────────────────┤
│ bobbydreamerContactForm │ bobbydreamercontactform  │ us-central           │
├─────────────────────────┼──────────────────────────┼──────────────────────┤
│ API Project - 1         │ api-project-333122123186 │ us-central           │
└─────────────────────────┴──────────────────────────┴──────────────────────┘

5 project(s) total.- Run the below command in the root directory of your site to initialize Firebase this creates a
firebase.jsonconfiguration file which is required to deploy assets with the Firebase CLI because it specifies which files and settings from your project directory are deployed to your Firebase project.
firebase initNote: If you run
firebase initagain for any specific Firebase service, the command will overwrite the corresponding section of filefirebase.jsonback to the default configuration for that service.
Below is the output of command firebase init, have a look at the input and response of the highlighted code,
  PS D:\BigData\08. HTML\Gatsby\lupin\bdv2> firebase init

      ######## #### ########  ######## ########     ###     ######  ########
      ##        ##  ##     ## ##       ##     ##  ##   ##  ##       ##
      ######    ##  ########  ######   ########  #########  ######  ######
      ##        ##  ##    ##  ##       ##     ## ##     ##       ## ##
      ##       #### ##     ## ######## ########  ##     ##  ######  ########

  You're about to initialize a Firebase project in this directory:

    D:\BigData\08. HTML\Gatsby\lupin\bdv2

  ? Are you ready to proceed? Yes
  ? Which Firebase CLI features do you want to set up for this folder? Press Space to select features, then Enter to confirm your choices. Hosting: Configure and deploy Firebase Hosting sites

  === Project Setup

  First, let's associate this project directory with a Firebase project.
  You can create multiple project aliases by running firebase use --add,
  but for now we'll just set up a default project.

  ? Please select an option: Use an existing project
  ? Select a default Firebase project for this directory: bobbydreamercontactform (bobbydreamer-site)
  i  Using project bobbydreamercontactform (bobbydreamer-site)

  === Hosting Setup

  Your public directory is the folder (relative to your project directory) that
  will contain Hosting assets to be uploaded with firebase deploy. If you
  have a build process for your assets, use your build's output directory.

  ? What do you want to use as your public directory? public
  ? Configure as a single-page app (rewrite all urls to /index.html)? Yes
  ? File public/index.html already exists. Overwrite? No
  i  Skipping write of public/index.html

  i  Writing configuration info to firebase.json...
  i  Writing project information to .firebaserc...

+ Firebase initialization complete!- Replace
firebase.jsonwith below content
{
  "hosting": {
    "public": "public",
    "ignore": ["firebase.json", "**/.*", "**/node_modules/**"],
    "headers": [
      {
        "source": "**/*",
        "headers": [
          {
            "key": "cache-control",
            "value": "cache-control: public, max-age=0, must-revalidate"
          }
        ]
      },
      {
        "source": "static/**",
        "headers": [
          {
            "key": "cache-control",
            "value": "public, max-age=31536000, immutable"
          }
        ]
      },
      {
        "source": "**/*.@(css|js)",
        "headers": [
          {
            "key": "cache-control",
            "value": "public, max-age=31536000, immutable"
          }
        ]
      },
      {
        "source": "sw.js",
        "headers": [
          {
            "key": "cache-control",
            "value": "cache-control: public, max-age=0, must-revalidate"
          }
        ]
      },
      {
        "source": "page-data/**",
        "headers": [
          {
            "key": "cache-control",
            "value": "cache-control: public, max-age=0, must-revalidate"
          }
        ]
      }
    ]
  }
}- Test the site from firebase perspective using command
firebase serve --only hosting. Just being careful as two technologies are involved here.
  PS D:\BigData\08. HTML\Gatsby\lupin\bdv2> firebase serve --only hosting
  i  hosting: Serving hosting files from: public
  +  hosting: Local server: http://localhost:5000
.......- Deploy the site to firebase using below command and at the end of deployment you will get the site URL.
firebase deploy -m "Initial Site"Output of firebase deploy
  PS D:\BigData\08. HTML\Gatsby\lupin\bdv2> firebase deploy -m "Initial Site"

  === Deploying to 'bobbydreamercontactform'...

  i  deploying hosting
  i  hosting[bobbydreamercontactform]: beginning deploy...
  i  hosting[bobbydreamercontactform]: found 666 files in public
  +  hosting[bobbydreamercontactform]: file upload complete
  i  hosting[bobbydreamercontactform]: finalizing version...
  +  hosting[bobbydreamercontactform]: version finalized
  i  hosting[bobbydreamercontactform]: releasing new version...
  +  hosting[bobbydreamercontactform]: release complete

  +  Deploy complete!

  Project Console: https://console.firebase.google.com/project/bobbydreamercontactform/overview
  Hosting URL: https://bobbydreamercontactform.firebaseapp.com
You can the check deployment details in Firebase Console as well,
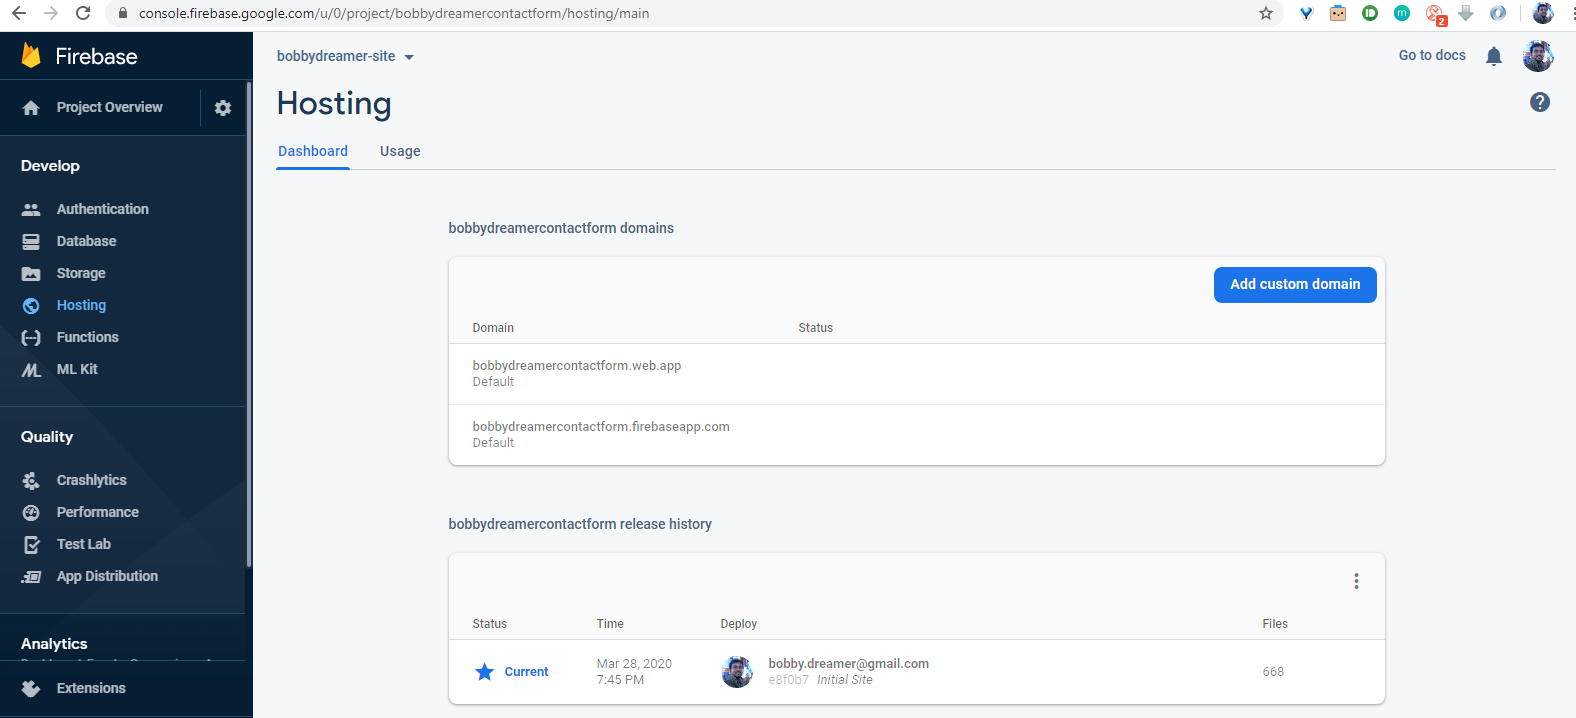
# Connecting to a custom domain
Source : Connect a custom domain
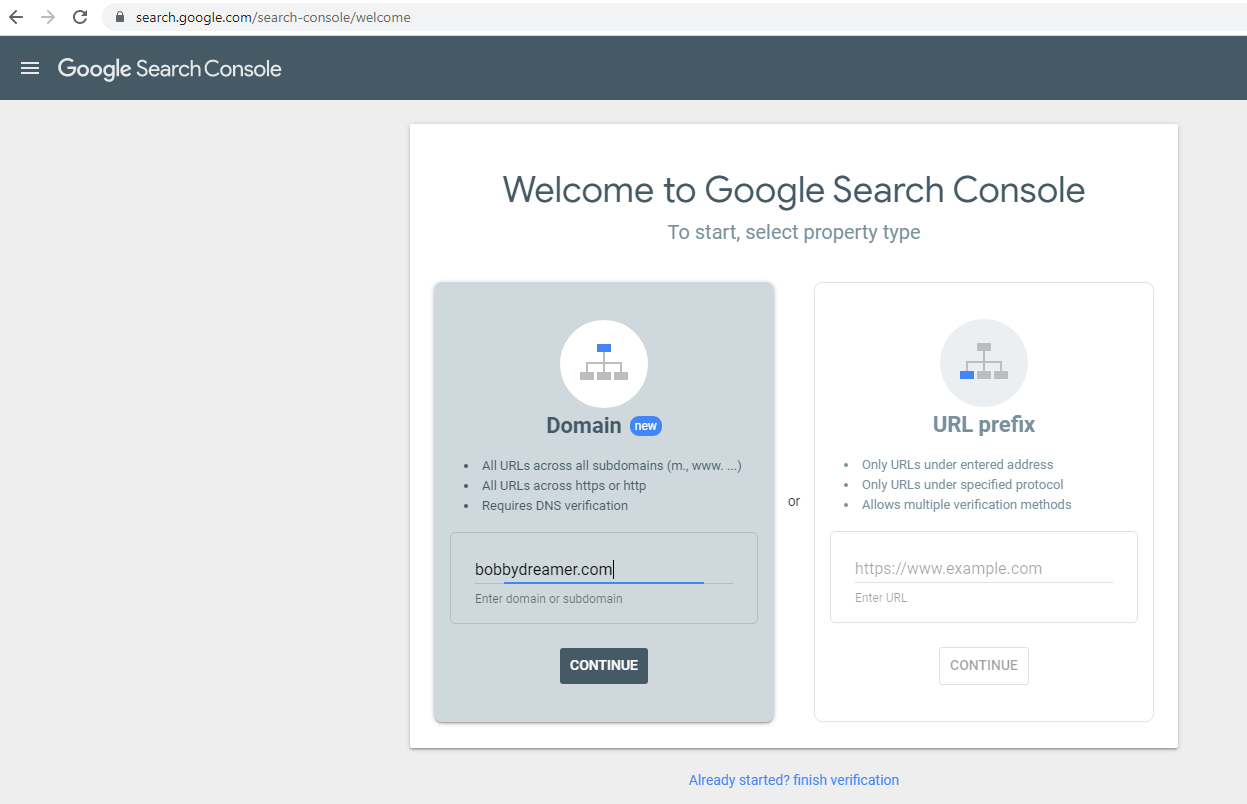
I have purchased a domain bobbydreamer.com using Google Domains and when setting up hosting there will be a process to verify ownership and to ease up that process, i am going to verify the ownership early by visiting Google Search Console, this doesn’t take much time actually and along with that, it will setup an account for the website where you will have a dashboard view of site’s performances and errors and many more. At this point, this Search Console dashboard is also new to me, so i am not going into it, at the moment.
Enter site name and click continue
Click Done
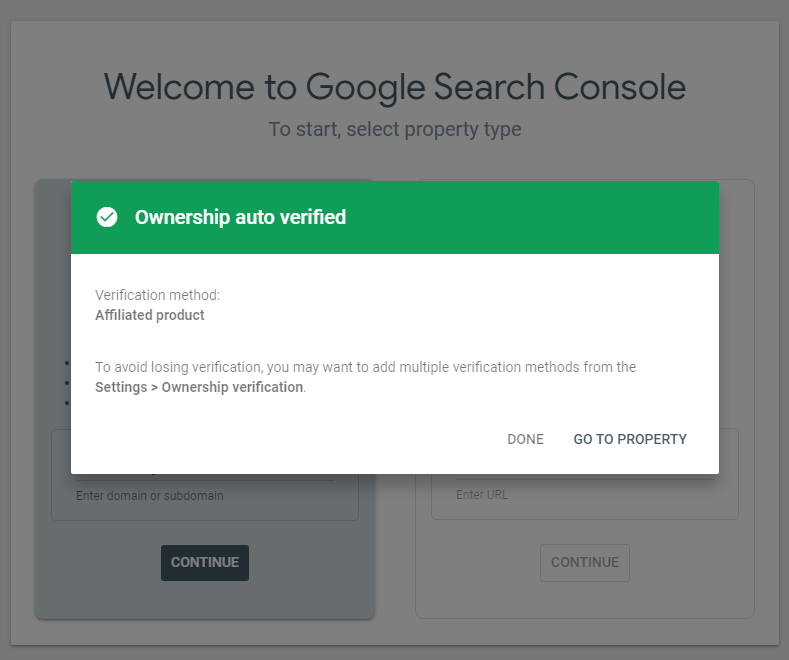
Note : This is an optional approach, if you have registered the domain using Google Domain, verification is automatic in Firebase hosting setup.
Perform the below steps in Firebase console in Hosting page,
-
Click Add custom domain button and fill in the site name as in the example and click continue.
You will skip section (2) as the site is already verified.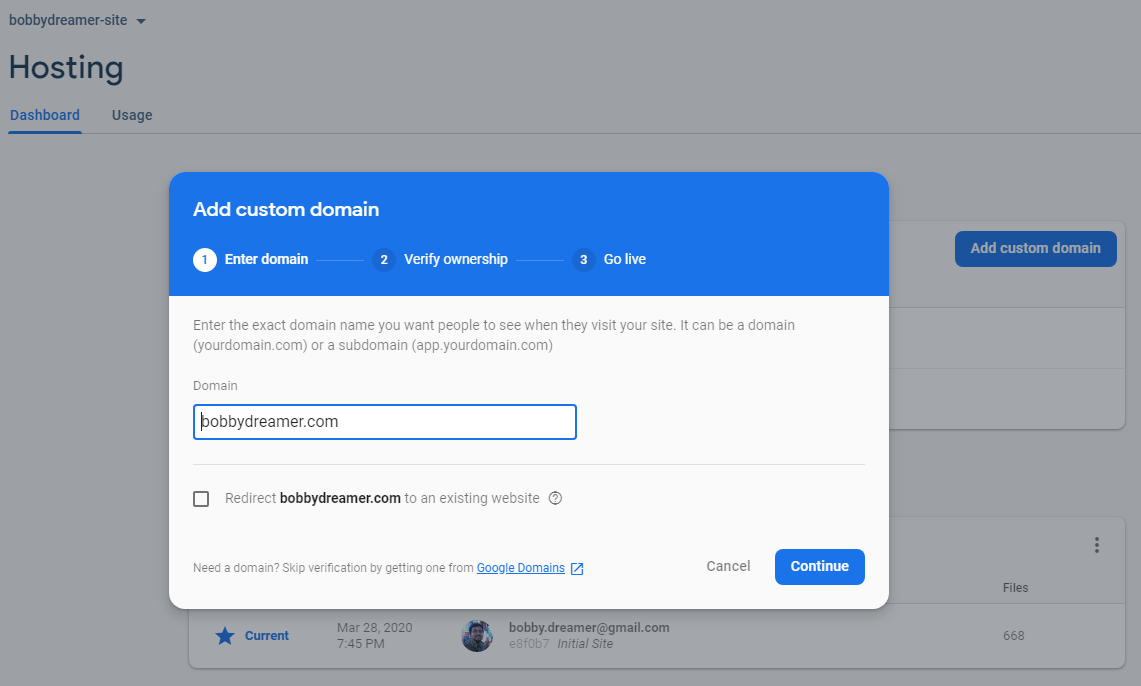
-
There are two modes either you go with “Quick” or “Advanced”
-
Quick Mode : You will have to add “A” records to your domain
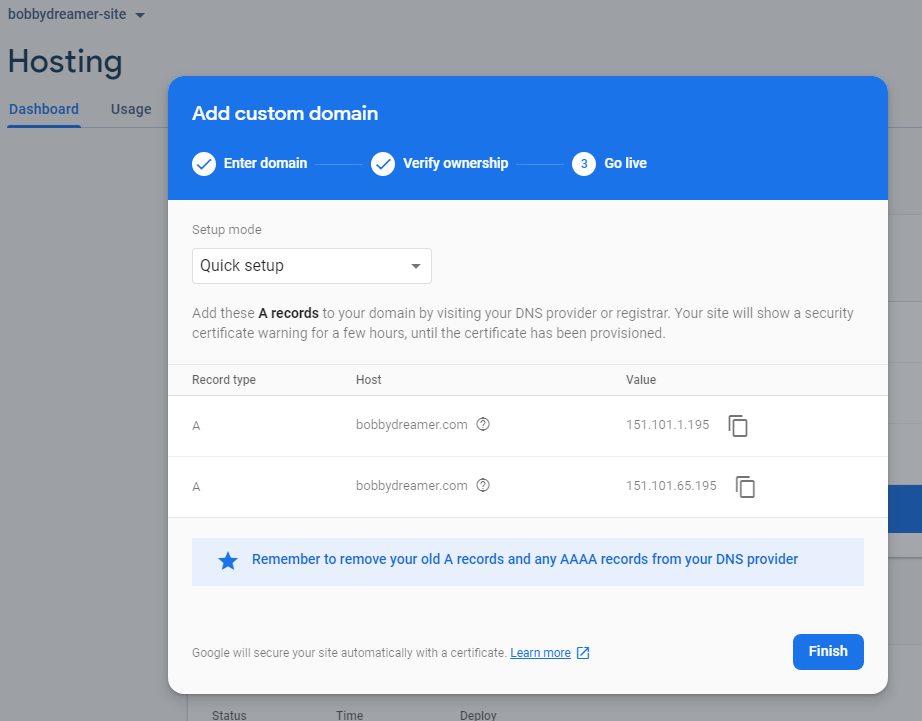
In Google domains, in the name field, you can give either
@as you are setting it up for a root domain or domain name as specified in “Add custom domain box” (ie.,bobbydreamer.com)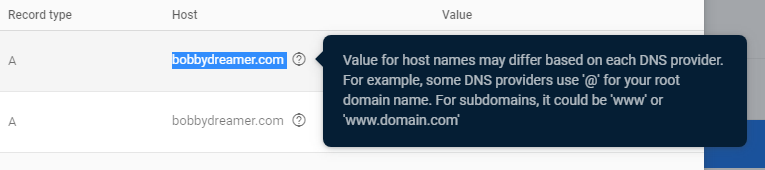
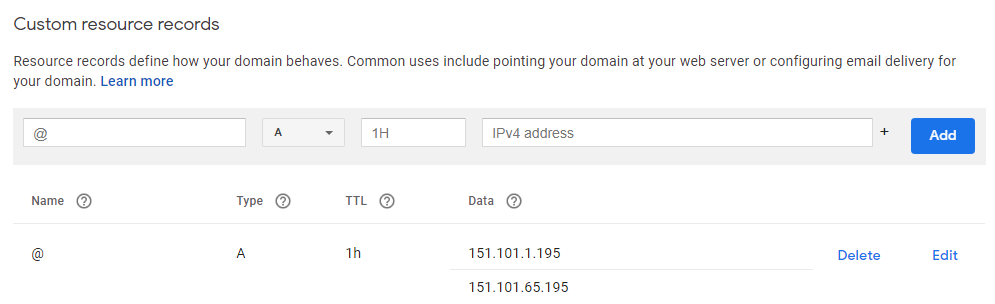
In Google domains, enter the “A” records and click “Add”
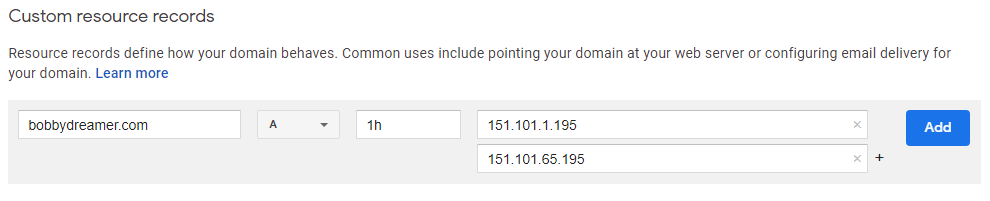
It should appear as below,
-
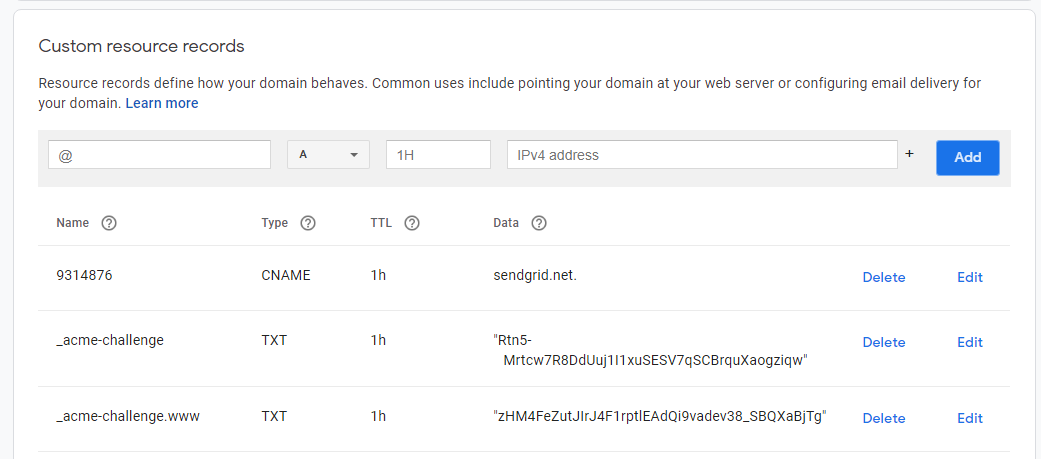
Advanced Mode : You will have to add “TXT” records. Copy & paste from firebase console to DNS provider.
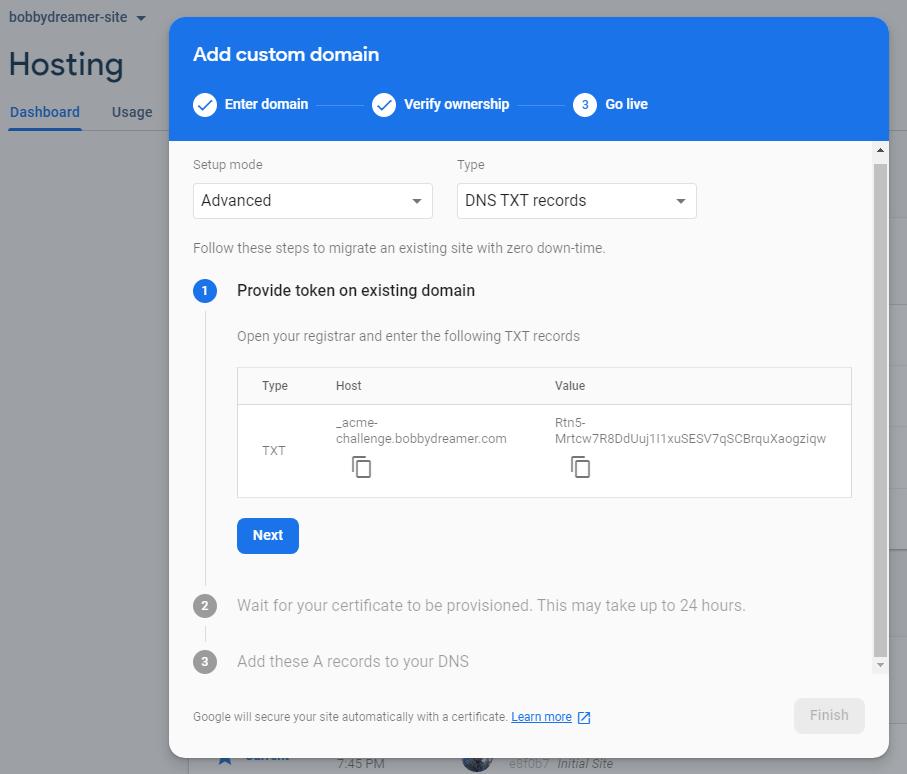
I have already added the “TXT” from Firebase hosting in Google domains, it looks like below(2nd & 3rd record),
To get to this part, it took 2Hrs
-
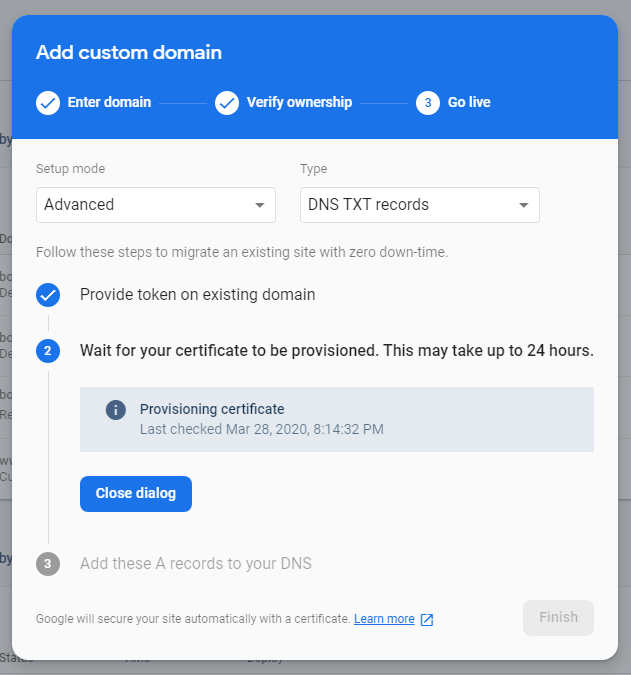
Note : This entire process is a time consuming process, its a wait and watch kind of scenario. For me, “Quick” mode approach was faster(took 2hrs), for you timeframe may vary.
-
Once the above process is finished, firebase asked me to setup for
www.bobbydreamer.comas initially i had set it up forbobbydreamer.com. Steps are pretty much similar to above and in the end it looked like below in Google Domains
-
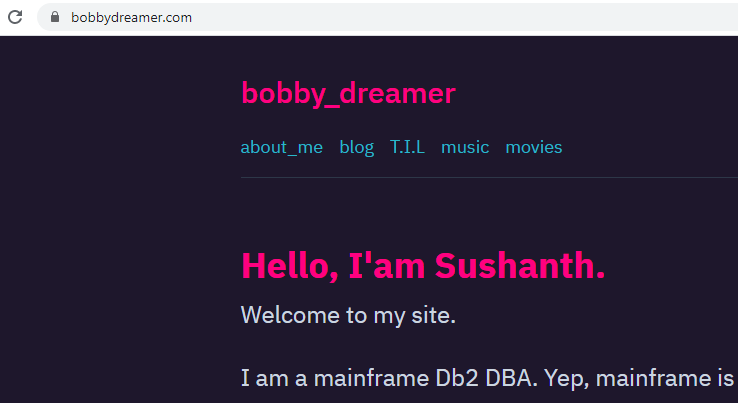
After few mins, i could see the new site
# Next time onwards
Only below commands are required to update content on the site,
gatsby clean
gatsby build
gatsby serve

firebase serve --only hosting
firebase deploy -m "New comment"
# Next steps
- Make quality content weekly
- Look for a CI/CD approach to build and deploy
- May be, just may be, try to implement the site via App Engine, Kubernetes and Cloud Run
# Technical terms & definitions
Google domains
-
Resource records : Resource records provide DNS-based information about the hardware and software components that point to and support your domain (hosts, name servers, web servers, email servers).
Each resource record consists of a set of fields:
| Fields | Description |
|---|---|
| Name | A label indicating the name or owner of the record. This can be the root domain (indicated by @) or a subdomain (such as “www”). |
| Type | The record’s type. For example, the A (address) record. |
| TTL | (Time-To-Live) How often a copy of the record stored in cache (local storage) must be updated (fetched from original storage) or discarded. Shorter TTLs mean records are fetched more often (access is slower, data is more current). Longer TTLs mean records are fetched from less often (access is faster, data is less current). The default value is 1 hour. Note: When you make changes to a resource record, It could take up to the length of the TTL time for the change to propagate. When you add a new resource record, it will be visible to Internet users in 5 minutes. |
| Data | The record’s data, which varies depending on the record’s type. For example, a host’s IP address for A records. Note that this is the data that is returned during a DNS search. |
-
Resource Record Types ( some commonly used record types )
In addition to the DNS resource records described here, Google Domains also supports synthetic records that extend the functionality of resource records.-
A : A (IPv4 address) records map the domain name of a host to the IP address of that host (name-to-address mapping).
@ A 1h 123.123.123.123Note: A records and AAAA records perform the same function. A records map to IP version 4 (IPv4) addresses. AAAA records map to IP version 6 (IPv6) addresses.
-
AAAA : AAAA (IPv6 address) records map the domain name of a host to the IP address of that host (name-to-address mapping).
www AAAA 1h 2002:db80:1:2:3:4:567:89abNote: A records and AAAA records perform the same function. A records map to IP version 4 (IPv4) addresses. AAAA records map to IP version 6 (IPv6) addresses.
-
CNAME : CNAME (canonical name) records map an alias domain name to a canonical (true) domain name. You can map multiple alias names to the same canonical domain (allowing you to set up A or AAAA record IP addresses in a single location).
In this example, www is the alias domain and example.com is the canonical domain (it’s mapped to an IP address using the A record)..
www	CNAME	1h	example.com.
example.com.	A	1h	123.123.123.123
In this example, www and FTP are alias domains and server1.example.com. is the canonical domain (it’s mapped to an IP address using the A record).
www	CNAME	1h	server1.example.com.
ftp	CNAME	1h	server1.example.com.
server1.example.com.	A	1h	123.123.123.123
CNAME records cannot be set for the root domain. Also, the target of a CNAME record can only be a domain name; paths are not allowed. If you want to redirect your root domain, or if your desired target is a URL that includes a path, try one of these options:
- Use the domain forwarding feature instead of a CNAME (see Domain forwarding).
- Create a Forwarding record using the same entries you would put in a CNAME
-
MX : MX (mail exchange) records map a domain name to a mail server receiving email for that domain. MX records identify which mail servers others use to send email to a domain.
Multiple MX records can be set up for a domain, each with a priority number, where lower numbers have higher priority. In the example below, if mail can’t be delivered using the host with the higher priority (10), the host with the lower priority (20) will be used.
@	MX	1h	10 mailhost1.example.com.
@	MX	1h	20 mailhost2.example.com.
If the priority numbers are the same (10 and 10), the MX records can be used to balance the load between hosts; either host will be chosen arbitrarily.
@	MX	1h	10 mailhost1.example.com.
@	MX	1h	10 mailhost2.example.com.
Note: Google Domains does not provide a separate field for the priority number. To specify a priority number, enter the value in the data field followed by the mail host (10 mailhost1.example.com.).
-
TXT : TXT (text) records contain arbitrary information, in the form of human-readable text or machine-readable data, that can be added to a resource record.
A TXT 1h ”This is my domain.”
-
# Resources
- Gatsby : Overview of the Gatsby Build Process
- Gatsby : Deploying to Firebase Hosting
- Firebase : Firebase CLI reference
- Firebase : Connect a custom domain
- Google Domains help